使用 Hexo 搭建个人博客
January 4, 2017
Tools
Note: 已经使用Hugo创建博客。
Hexo 是一个博客框架,支持Markdown,通过命令行可以快速部署, 有大量的主题和插件,让你的blog飞起来…
安装 Hexo
sudo npm install -g hexo-cli

hexo -v
创建 Github blog project
个人习惯将source和deploy分开,在github上创建一个blog项目(保存源文件)和 xxx.github.io项目(用于部署Github个人主页,xxx为用户名,具体参考Github Pages)
hexo init blog

cd blog

npm install
Run server
$ hexo s
More info: Server
设置博客页个人信息
我的配置文件 _config.yml
# Site
title: Whisperd
subtitle:
description: make a difference
author: kaichao
language:
timezone: Asia/Shanghai

# URL
## If your site is put in a subdirectory, set url as 'http://yoursite.com/child' and root as '/child/'
url: https://kaichaosun.github.io/
root: /
permalink: :year/:month/:day/:title/
permalink_defaults:
绑定Github地址
$ npm install hexo-deployer-git --save
修改 _config.yml 文件
# Deployment
## Docs: https://hexo.io/docs/deployment.html
deploy:
  type: git
  repo: git@github.com:kaichaosun/kaichaosun.github.io.git
  branch: master
More info: Generating
创建post
hexo new hello-world
Deploy
hexo clean

hexo deploy
绑定万网域名
- 在hexo博客项目,source目录下添加名称为
CNAME的文件,内容为个性化域名,如:whisperd.tech - 在阿里云
域名管理对应的域名下添加新的域名解析策略,如下图:
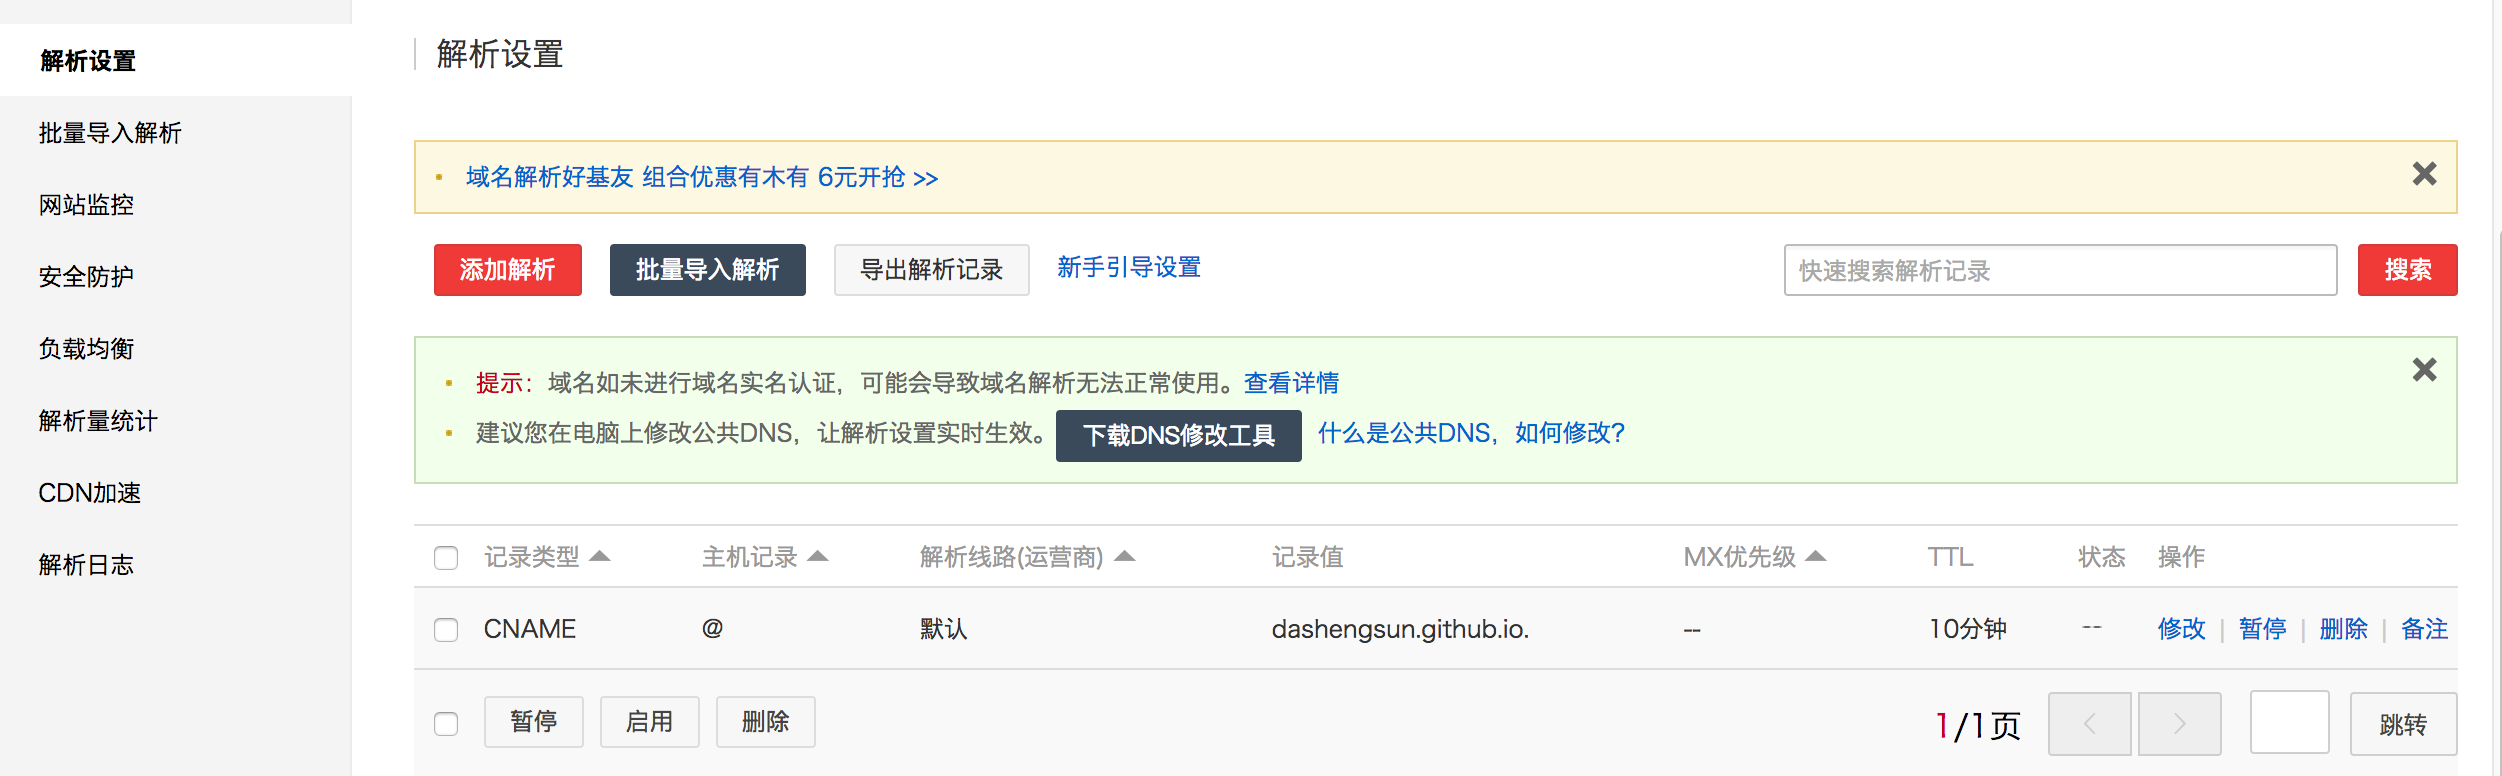
注意: kaichaosun.github.io.后有.,主机纪录为@
All done, enjoy your blog travel.
Reference
[1] https://gist.github.com/btfak/18938572f5df000ebe06fbd1872e4e39